Get started
Getting started
From sign-up to your first published agent.
Create your account
Sign up at the VoiceSquad console with your work email. You land on a short onboarding screen, Welcome! Let's get you set up., which collects three things:
- Full name, used on agents and versions you create so your team can see who changed what.
- Organisation name, pre-filled from your email domain. This becomes your workspace name and you can rename it later in Settings.
- Industry, a select for the industry your organisation works in.
Submitting the form creates your workspace and drops you on the Home dashboard. If you arrived through an invite link instead, the screen reads You're joining with the workspace name, and only asks for your full name: the workspace already exists, so there is nothing else to set.
Pick a start path
Home greets you with How do you want to start? and two cards. Both end in the same place, the agent editor, so pick whichever matches how well you already know what the agent should say.
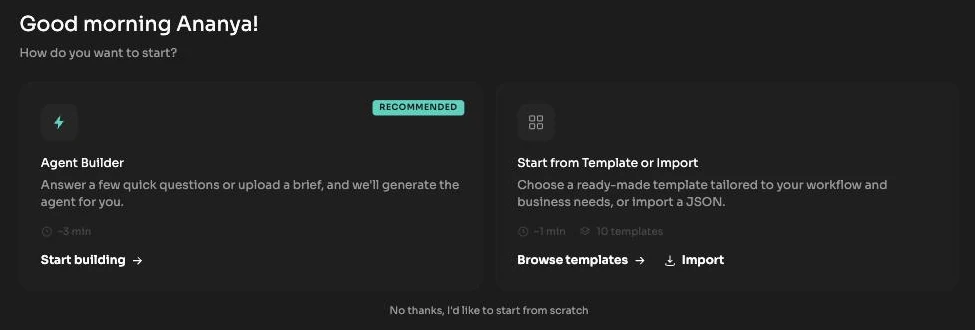
Agent Builder
The card badged RECOMMENDED opens a three step wizard that drafts the agent for you from a description.
- Agent Setup: give the agent a name, choose one or more languages (star one as the primary language), pick a voice gender, and set the call direction to Incoming or Outgoing. Outgoing agents can also declare payload data and the from and to numbers here.
- Use Case: answer Briefly describe your use case and What should this call achieve?. Both fields are word counted and want at least 100 words each. The more concrete you are about who calls, what they ask for and what counts as a good ending, the closer the generated prompt lands.
- Tools, optional: add the actions the agent should be able to take, for example booking a slot or looking up an order. You can skip this and add actions later in the editor.
Create Agent sends the brief to VoiceSquad, which writes the first draft of the prompt, goal and settings and opens it in the editor for you to refine.
Start from Template or Import
The second card is the faster route. Browse templates opens a searchable gallery of ready made agent prompts grouped by industry: Real Estate, BFSI, Healthcare, Ecommerce, Automotive, Education, Travel, Recruitment, SaaS, Logistics, Local Services and Utilities. Examples include a Real Estate Lead Qualification Agent, a Debt Collection Reminder Agent, an Abandoned Cart Recovery Agent and a Candidate Screening Agent. Choosing one seeds the use case description, which you then edit before generating.
The Import button on the same card rebuilds an agent from a JSON file exported out of any VoiceSquad workspace. That is how you move an agent between workspaces, or restore one from a file you kept.
Start from scratch
Under the two cards, No thanks, I'd like to start from scratch opens the same Create a new agent modal you get from the New Agent button on the Agents list. It asks only for an Agent name, with the placeholder e.g. Billing Support Agent. Press Create Agent and a real draft agent is created immediately, then the full editor opens on it. Nothing is generated for you: the prompt starts empty and everything is yours to write.
The golden path
However you started, the route to a live agent is the same five moves. Each one has a page of its own.
- Build. In the editor, write the universal prompt, pick a voice and timezone, choose how the call opens, and set the conversation goal. See the agent editor.
- Connect. Attach the things the agent needs: a knowledge base for facts it should know, tools for actions it should take, and a phone number for the call to arrive on or dial out from.
- Test. Use Test Audio and Test Chat in the right panel for quick runs, then build a simulation library for the cases you care about. See testing your agent.
- Publish. Publish Agent promotes your draft to the live version and moves the previous one into version history. See agents and versions.
- Watch. Every call lands in Conversations with a transcript, recording and evaluation, and rolls up into Reports.